The Infamous Crispy Shiitake Mushrooms


Ironically, some of the best inventions are created from the worst mistakes. In any industry this is true, but this is often NOT the case in the culinary world, where the words "burned", "charred", "overcooked", and "way too well done" seem to plague any chef trying to make something good out of something that went terribly bad.

Or, in one fantastic case, I gained the opportunity to create sometime sublimely delicious out of what could have been one of the biggest catering "mistakes" of my career. All involving one of my favorite ingredients: the shiitake mushroom.

With lack of stove top space left in the tight-spaced kitchen and pounds of mushrooms to sauté for service as a garnish for filet mignon, I figured I had to "improvize". Knowing my ovens weren't being used at the moment, I decided to toss all of the mushrooms with olive oil, salt and pepper, get them onto sheet pans, throw them in a 400*F oven, and "sauté", or "roast" them until they began to slightly caramelize.

But, being sidetracked with other catering issues (and forgetting to set my timer), I absentmindedly forgot about checking on the 10 pounds of mushrooms now wasting away in the oven's inferno. About 30 minutes after succumbing my funghi to the perils of the oven, I thought I was doomed. I took a deep breath, closed my eyes, opened the oven doors.

Instead of finding ashen remnants of what "were" mushrooms, I found shrunken, perfectly browned and slightly crisp slivers of shiitakes. I took the sheet pans out, drained the mushrooms on paper towels (which allowed them to cool and crisp up even more), took a bite, and this deep, earthy, and salty flavor flooded my taste buds. This was something unlike anything I had ever tasted before, and with each sampling, these mushrooms were becoming slightly addicting.

My clients and their guests raved about the meal, but most importantly they all wanted to know, "what were those crunchy, yummy things on top of the filet?" With conviction that it was my "plan" all along to make these shiitakes, I told the guests what they were and explained how I made them, to which my client asked if I could leave all of the leftover shiitakes behind as she wanted to use them as a salad topping the next day.

And, with a diverted mistake, my famous crispy shiitakes were created.

Garnish a salad, soup, meat, pasta dish, or simply enjoy these crunchy little devils on their own. I promise, if you are a mushroom fan, you too will become slightly addicted. 

Ingredients:


  • fresh shiitake mushrooms, stemmed, and thinly sliced (see below)
  • extra virgin olive oil
  • sea salt


Preheat oven to 350*F. Stem and slice the shiitake mushrooms.


The thinner you slice the mushrooms, the quicker and more evenly they will cook and the crispier they will turn out. I slice mine about 1/4" thick.


Toss shiitakes on cookie sheet and coat heavily with olive oil. 


Here's the trick: you want to use more olive oil than you think. The mushrooms will soak up the oil at this stage, but they will release it during the cooking process. If you don't have enough oil on the mushrooms, they will dry out and burn, so make sure to add enough olive oil. Heavily season with salt.


Pop the sheet pan in the oven, and wait about 20-30 minutes (may be longer or shorter depending on how much you are cooking), and watch the shiitakes shrink, brown, and crisp (see in this picture how the olive oil is released).


YUM.


Drain on paper towels and allow to cool, unless you can't contain yourself, like me, and start snacking on them immediately.


Earthy, crunchy, salty, yummy. These shiitakes are so versatile and always good to have on hand. Store in a plastic bag or container with a paper towel (to soak up any moisture) - these mushrooms will last up to a week stored in fridge or room temperature. If they get a little soggy, just throw back on a cookie sheet and pop in oven to crisp up.

Cheers and enjoy.

Butternut Squash Gnocchi with Fried Sage and Browned Butter


Fall is finally upon us, a grouping of a couple of months that keep my mind day dreaming about simple yet comforting foods, using all ingredients that September, October, and November have to offer. I love to see all of the pumpkins showing up at markets, reminding me vividly of the corner Pumpkin Patch my Mom used to take us as kids to pick out - my sister being obsessed with carving, I being obsessed with toasting the pumpkin seeds with salt and devouring each and every crunchy, nutty morsel.


Call it a hunch I would be involved in the culinary field one day...


But, thinking about the squash/gourd family of vegetables, one of my all-star ingredients to work with in the Fall is butternut squash. It's nutty yet naturally sweet flavor lends itself beautifully to soups, casseroles, pasta dishes, even roasted on its own with some herbs and olive oil - yet, in my favorite case, it is a welcome addition to homemade potato gnocchi.


I adore these soft, Italian "pasta" dumplings that literally melt in your mouth when cooked perfectly. Fellow Foodie and I recently saw a recipe that Lidia Bastianich wrote for Bon Appetit and had to take a stab at it - however, we have changed it up a bit.


Homemade gnocchi can be and usually is a little labor intensive (as you will see by the steps/photos below), but the work is absolutely worth every fantastic flavorful bite in the end. Especially when quickly sauteed in a little browned butter and garnished with some crispy fried sage leaves.


Time to devour.


Ingredients:


1 1-pound butternut squash, halved, seeds scooped out, and then quartered
olive oil
2 medium sized russet potatoes, peeled and cut in half
1/2 cup finely grated Parmesan cheese, plus more for plating
1 large egg, beaten to blend
2 teaspoons freshly grated nutmeg
1 1/2 teaspoons salt
1 3/4 cups (or more) all purpose flour
1/2 cup (1 stick) butter
a huge handful of fresh sage leaves
Sea salt and cracked black pepper


Special items: either a potato ricer or a colander


First things first: preheat the oven to 400*F; place the quartered pieces of squash on a cookie sheet and drizzle with olive oil and sprinkle with a little sea salt and cracked pepper.


Roast in oven for about 30-40 minutes or until the squash gets browned in spots and is extremely fork tender.


Allow squash to cool slightly, then scoop flesh into a food processor to puree until smooth.


The next step is key to producing a great gnocchi: cooking the liquid out of the butternut squash puree. Easiest way to do this (outside of using cheesecloth) is to cook the puree down to a thick paste, allowing the water to evaporate from the puree. So, add the squash puree to a small sauce pan and cook over medium high heat until mixture begins to thicken, about 5-10 minutes, stirring constantly.


Remove from pan and allow to cool completely (can be made at least a day ahead). 


Next up, the main ingredient for proper gnocchi: the potatoes.


Peel and halve the potatoes and add them to a sauce pot filled with cold water and a lot of sea salt. Bring to a boil and cook potatoes until fork tender. Drain completely and make sure the potatoes are very dry.


Next, if you have a potato ricer, use it. If you don't (or "insert here": "I don't know what a potato ricer is...") don't worry. If you have a colander, which I hope you do, you are in luck. A potato ricer is a kitchen gadget that generally looks like an oversized garlic press, only it is used to "crush" the potatoes through small holes and make them lighter and airier. But, as I said, if you don't have one, use a colander. As I don't own one either, I first mashed the potatoes.


Then, using a spatula, I ran the mashed potatoes against the small holes of a colander, creating the same end product a potato ricer would (oh, the ingenuity using other gadgets in the kitchen...).


Yes, folks, this is what the potatoes should look like, colander or ricer...


Next up, add 1 C of the butternut squash puree to the potatoes, parmesan cheese, nutmeg, egg, and salt and pepper. Mix together well.


Sift the flour before adding to the squash/potato mixture. Start with 1 3/4C. The dough will be tacky, and you can add up to 1/4C more if you feel you need to. Allow the "dough" to sit for about 30 minutes. In the meantime, pour yourself a glass of wine...(I'm just saying...)


After letting the dough rest (and finishing your glass of wine...), portion the dough out into small balls and, on a lightly floured surface, begin rolling out into long strands, about 3/4" thick.


Cut the strands into 3/4" - 1" long pieces. 


And then, begin the "gnocchi" making process.


Take each little gnocchi "pillow", and, using the back of a fork, gently roll the dough down the fork, gently pressing against the tines to create the dimpled lines in the dough.


All of this can be done at least 24 hours ahead of time.


When ready, bring heavily salted water to a boil and pop in your gnocchi. They will take about 13-15 minutes to cook.


Drain the gnocchi and start on the fried sage leaves. Heat a large skillet with a giant knob of butter, toss in a bunch of fresh sage leaves, and cook over medium heat until sage starts to crisp.


Remove from pan and drain on paper towels.


And, to the same pan, add a little bit more butter, allow to "brown" a bit, and then toss int he drained gnocchi to saute.


A quick flip...


YUMMMM...


And plate.


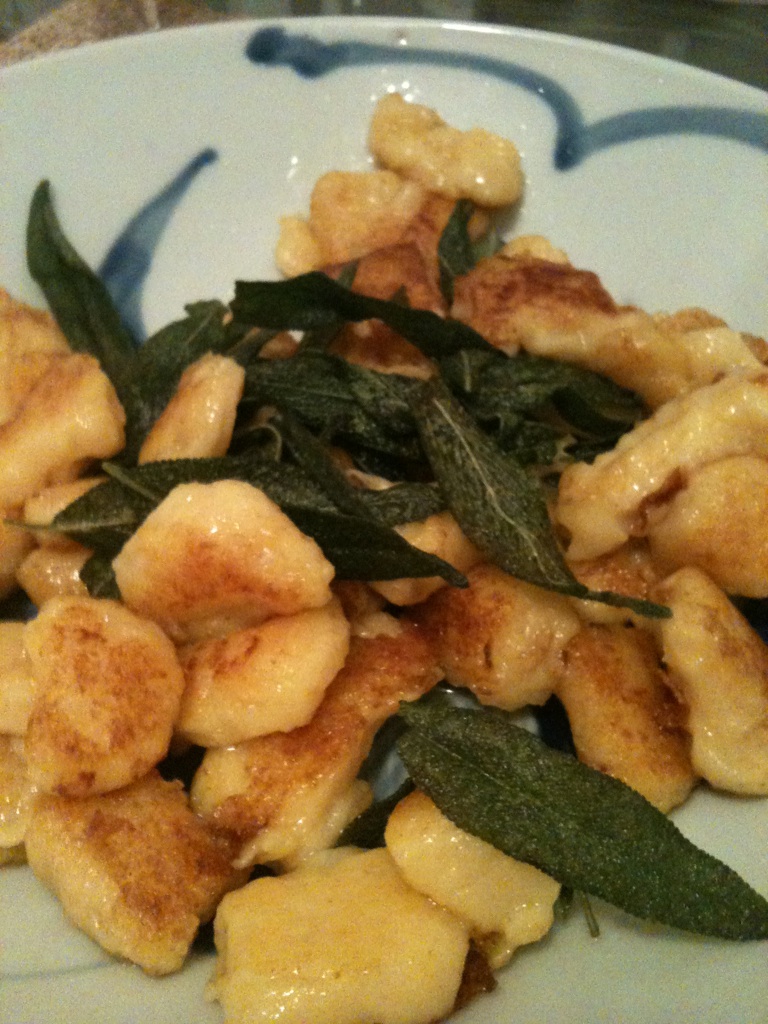
Butternut squash gnocchi with fried sage leaves and browned butter.


I cannot explain how heavenly this dish was. Worth every moment of effort. The sweetness of the squash balanced perfectly with the potatoes, and the hint of nutmeg added the right level of depth. And, obviously the browned butter with the fried sage leaves only made the dish that much more jaw-dropping-delicious. 

Sauteeing these lovely gnocchi gave them a lovely, light crust. When you bite into them, literally, it is like, once again, heaven. Kinda like being transported to northern Italy, with a brisk chill in the air, sitting down to a warming plate of these pillows of deliciousness.

Cheers and enjoy.